Grid view
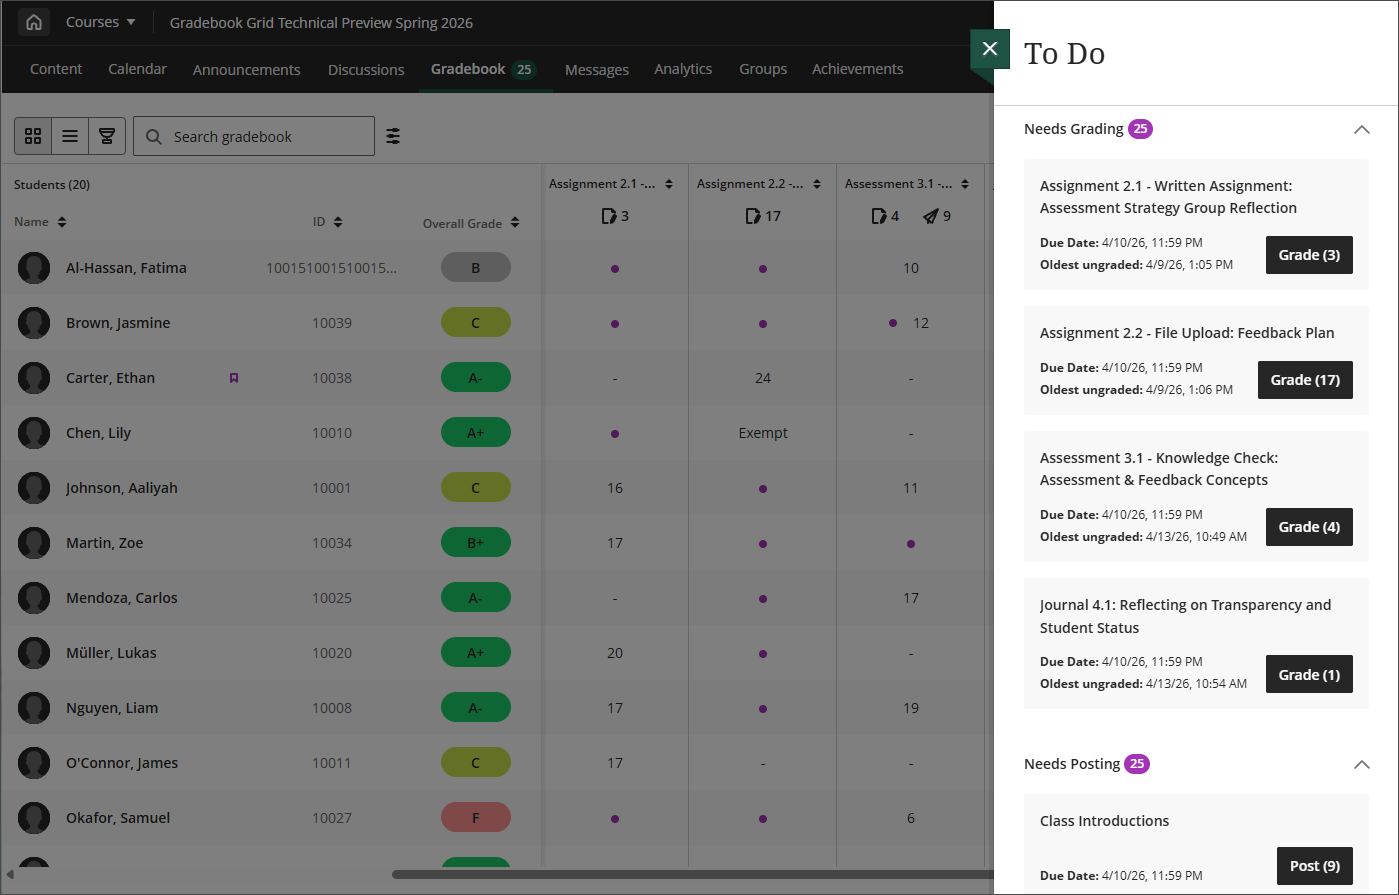
Students are listed on the left (Name, ID, Overall Grade). Each gradable item has its own column on the right.
In the gradable item columns:
-
Select the Needs Grading icon (a page with a pencil in the corner) to open the submissions view, filtered to Needs Grading, for that item.
-
Select the Post Grades icon (a paper airplane) to post all grades for that item at once. A confirmation dialog appears before anything posts.
-
Select the item's name to open the Assessment Details panel.
-
Select an individual grade cell to open the Grade Details panel.
Assessment Details panel
Select an item's name to open this panel. Use the left/right arrows to move to the next item without closing it. From here, you can:
-
Select View submissions to go to the submissions view for all submissions on that item
-
Select Post all grades, if there are grades ready to post
-
Select the bell icon to send a reminder to students who haven't submitted yet
-
Select the download icon to download results. Prior to downloading the results, you can define the file type, format of results (by student or by question and student), and which attempts to include in the download.
-
Select the statistics icon to view statistics for the item
-
View details such as due date, grade settings (grade unit, attempts, visibility, category, posting), and accommodations, exceptions, and exemptions for that item
-
Select Delete Item to remove the item and associated submissions, grades and student data
Grade Details panel
Select any cell to open the Grade Details panel for that student's submission. From here, you can:
The To Do panel
In the gradebook, select To Do to open a panel of grading tasks over the gradebook.
-
Needs grading: lists submissions ready for grading, oldest ungraded submissions first, so you can prioritize. Select an item to open the submission and start grading. Peer assignments aren't listed here.
-
Needs posting: lists graded assessments that are ready to post.
-
Needs reconciliation: lists grades that require reconciliation.
Students
The Students view lists the names of all your students with their dates of last access and their overall grades. You can view overall grades if you’ve set up the overall grade for the course. Students with grading accommodations have a purple flag with their name.
- You can directly message students and add accommodations from the Students view.
- Search for particular students by name, username, or student ID. If you don’t see usernames, your institution’s privacy policies are keeping usernames hidden.
- Select a student’s name to go to their student overview.
Delete Grade Center Columns
Follow these steps to remove unwanted columns in your grade center. For example, duplicate copies of the Total or Weighted Total columns that came in from a course import process (please note that you must have one copy of each of those columns in your grade center to enable final gradebook submission).
1. In your course shell go to the Gradebook tab and select grades.
2. Click on the gradebook item to open the drop-down menu.
3. At the bottom of the list, select Delete Column and click OK. This cannot be undone.

*Note: If the Delete Column option is not displayed then that column is still linked with a graded activity within your Blackboard course shell. You will need to delete that activity (e.g. Assignment, Test, Discussion Board) before removing the grade center column.